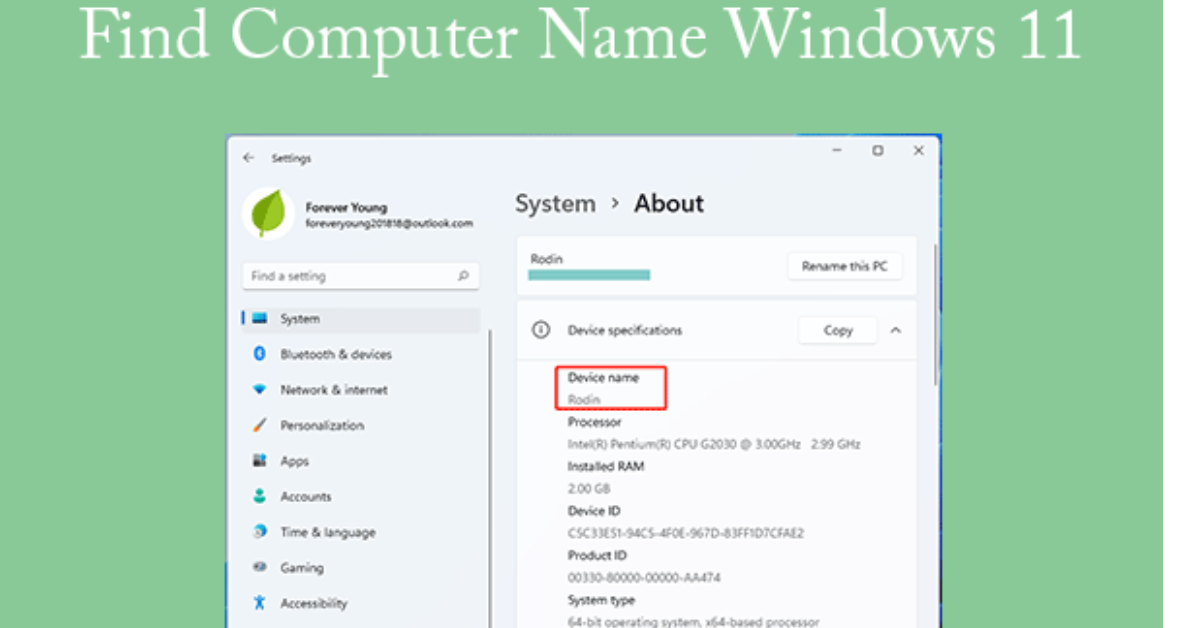
Whether you’re setting up a network, connecting devices, or troubleshooting software, knowing your PC’s name can be essential. Windows 11, with its fresh interface and new features, has made it simple to locate this information. Here’s how to find your PC name in Windows 11, step-by-step.
Why Knowing Your PC Name Is Important
Before diving into the process, understanding why knowing your PC name matters can be useful. Your computer’s name is essentially its identity on a network. If you have multiple devices or are in an environment where devices are networked, distinguishing between them is crucial for smooth operations, remote access, and file sharing.
Methods to Find Your PC Name in Windows 11
Method 1: Using the Settings App
The most straightforward way to find your PC name in Windows 11 is through the Settings app.
- Open Settings:
- Click on the Start button or press the Windows key on your keyboard.
- Select Settings (represented by a gear icon).
- Navigate to System:
- In the Settings window, click on System in the left pane.
- Locate PC Name:
- Scroll down and select About at the bottom of the System section.
- Under Device specifications, look for Device name. This is the name of your PC.
Method 2: Using the Control Panel
For users more familiar with older versions of Windows, the Control Panel provides an alternative way to find the PC name.
- Open Control Panel:
- Press Windows + R to open the Run dialog box.
- Type control panel and press Enter.
- Navigate to System:
- Select System and Security.
- Click on System.
- Find Your PC Name:
- Your computer’s name will be displayed under Computer name, domain, and workgroup settings.
Method 3: Using Command Prompt
If you prefer using command-line tools, Command Prompt is an efficient way to check your PC’s name.
- Open Command Prompt:
- Press Windows + R to open the Run dialog box.
- Type cmd and press Enter.
- Enter the Command:
- Type hostname and press Enter.
- The result displayed is your PC’s name.
Method 4: Using System Information
System Information provides an in-depth overview of your computer and is another way to find the PC name.
- Open System Information:
- Press Windows + R and type msinfo32, then press Enter.
- Find Your PC Name:
- In the System Summary section, look for the entry called System Name. This is your computer’s name.
Quick Tips for Renaming Your PC in Windows 11
If you find that the current name of your PC is not suitable and you want to change it:
- Go to Settings:
- Open Settings and go to System > About.
- Rename Your PC:
- Click on Rename this PC and enter the new name.
- Restart your computer for the changes to take effect.
